Search Knowledge Base by Keyword
Microsoft SharePoint
Summary
Legito add-on for Microsoft SharePoint automatically uploads Word and/or PDF documents generated in the Legito Workspace to SharePoint.
Legito add-on for Microsoft SharePoint is not a stand-alone application, but an extension of the Legito Workspace which allows for easy and smooth integration between Legito and Microsoft SharePoint accounts.
End User Experience
The integration between Legito and Microsoft SharePoint works in the background. There are no special actions for end users to perform to upload generated documents to SharePoint.
Once the user completes a defined triggering action (typically by clicking the Save button in Legito Document Editor), the document(s) in the defined format (Word, PDF, etc) are uploaded to a defined folder in SharePoint.
Adding Legito add-on to SharePoint
Download Legito’s SharePoint Connector.
Download Legito’s SharePoint Connector
Go to the Power Apps section in SharePoint.
Choose the Custom connector item in the left menu.
Click on the New custom connector button located in the top right corner and select Import an OpenAPI file in the dropdown.
Insert a name e.g. Legito. Click on the Import button, select the downloaded LegitoConnector file, and confirm by clicking Continue.
On the next screen, click the Create connector button in the top right corner.
Download Legito’s SharePoint Application.
Download Legito’s SharePoint Application
Go back to the Power Apps section in SharePoint and select the Apps item in the left menu.
Click on the Import canvas app button in the top left corner.
Then click the Upload button and choose the downloaded LegitoApplication file.
Once uploaded, the Legito application (resource type: App) and the Legito Connector (resource type: Connector) will appear on the next screen.
First, click on the wrench icon in the Action column of your Legito App. Open the Setup dropdown, choose Create as new, and click Save.
Next, click Select during import in the Import Setup column of the Legito Connector. Choose Legito (it may take a few seconds to appear), and click Save.
Click on the Import button in the bottom right corner.
You should see a confirmation page with green check marks. If so, congratulations, you successfully installed the Legito add-on to SharePoint!
Integration Set-up
Go back to Apps to view the Legito app. Click the play icon to set up the integration. You may have to allow the Legito add-on permissions on the next screen before you can proceed.
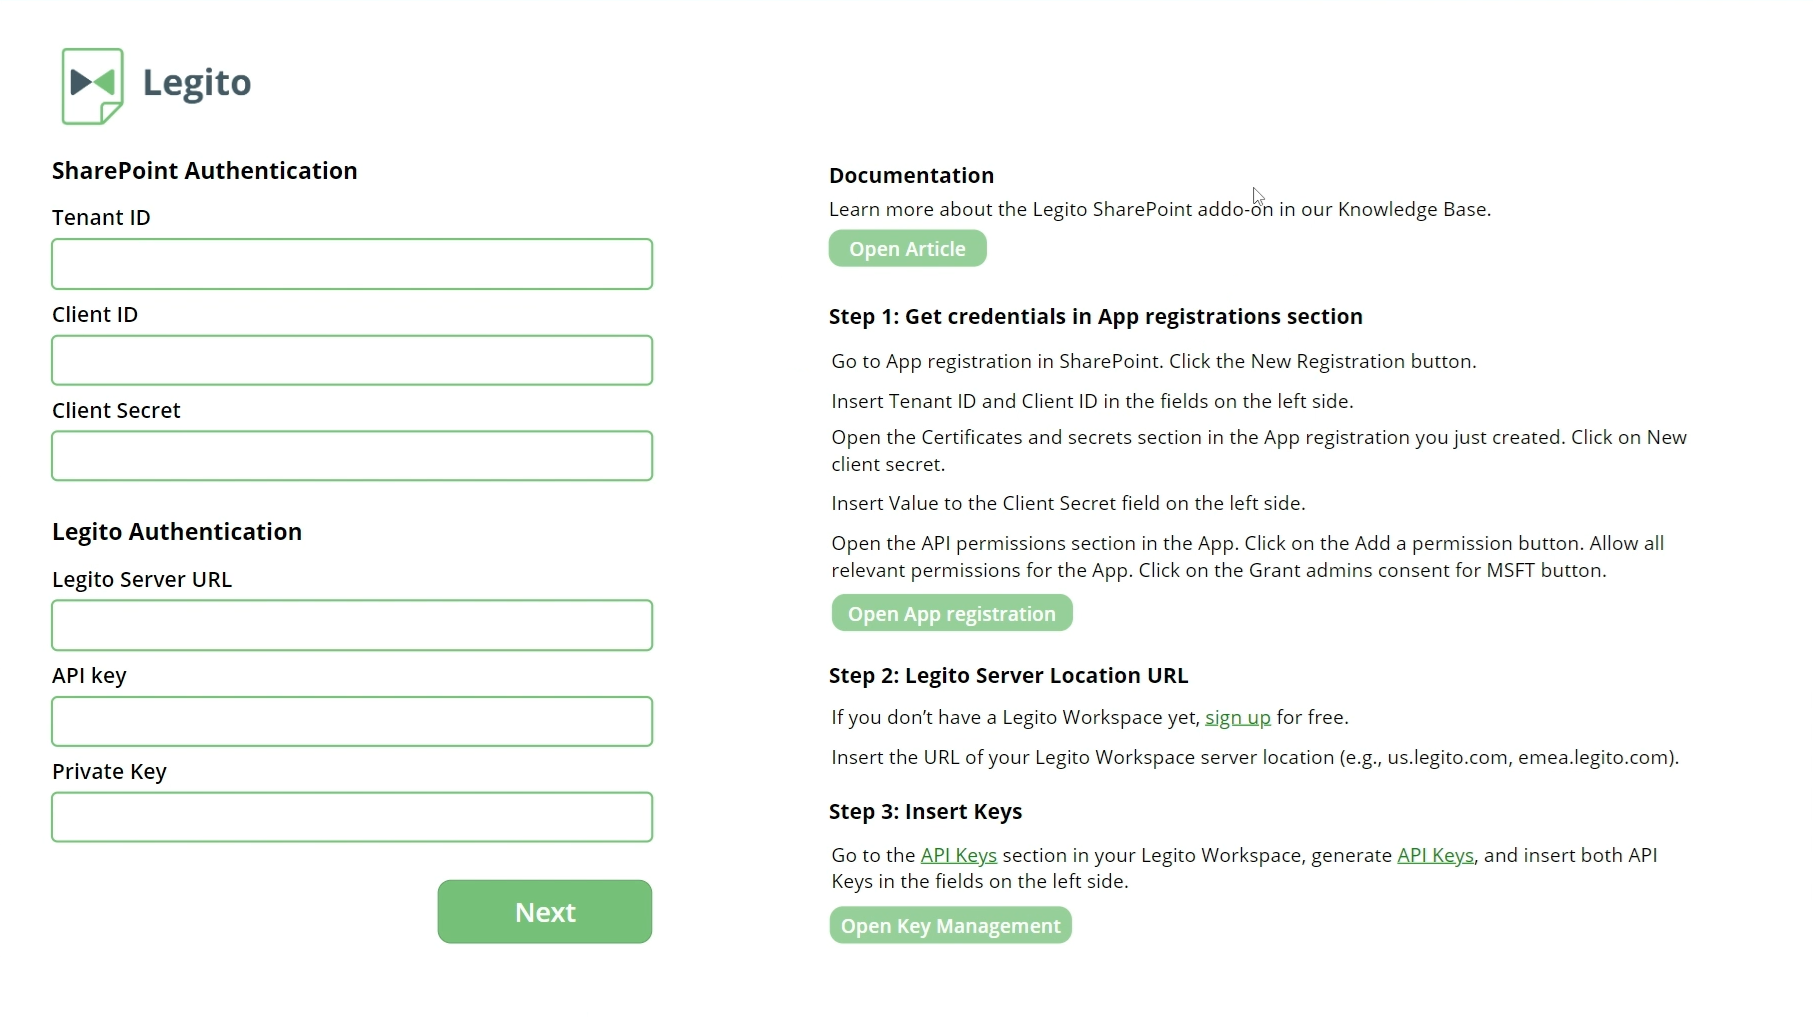
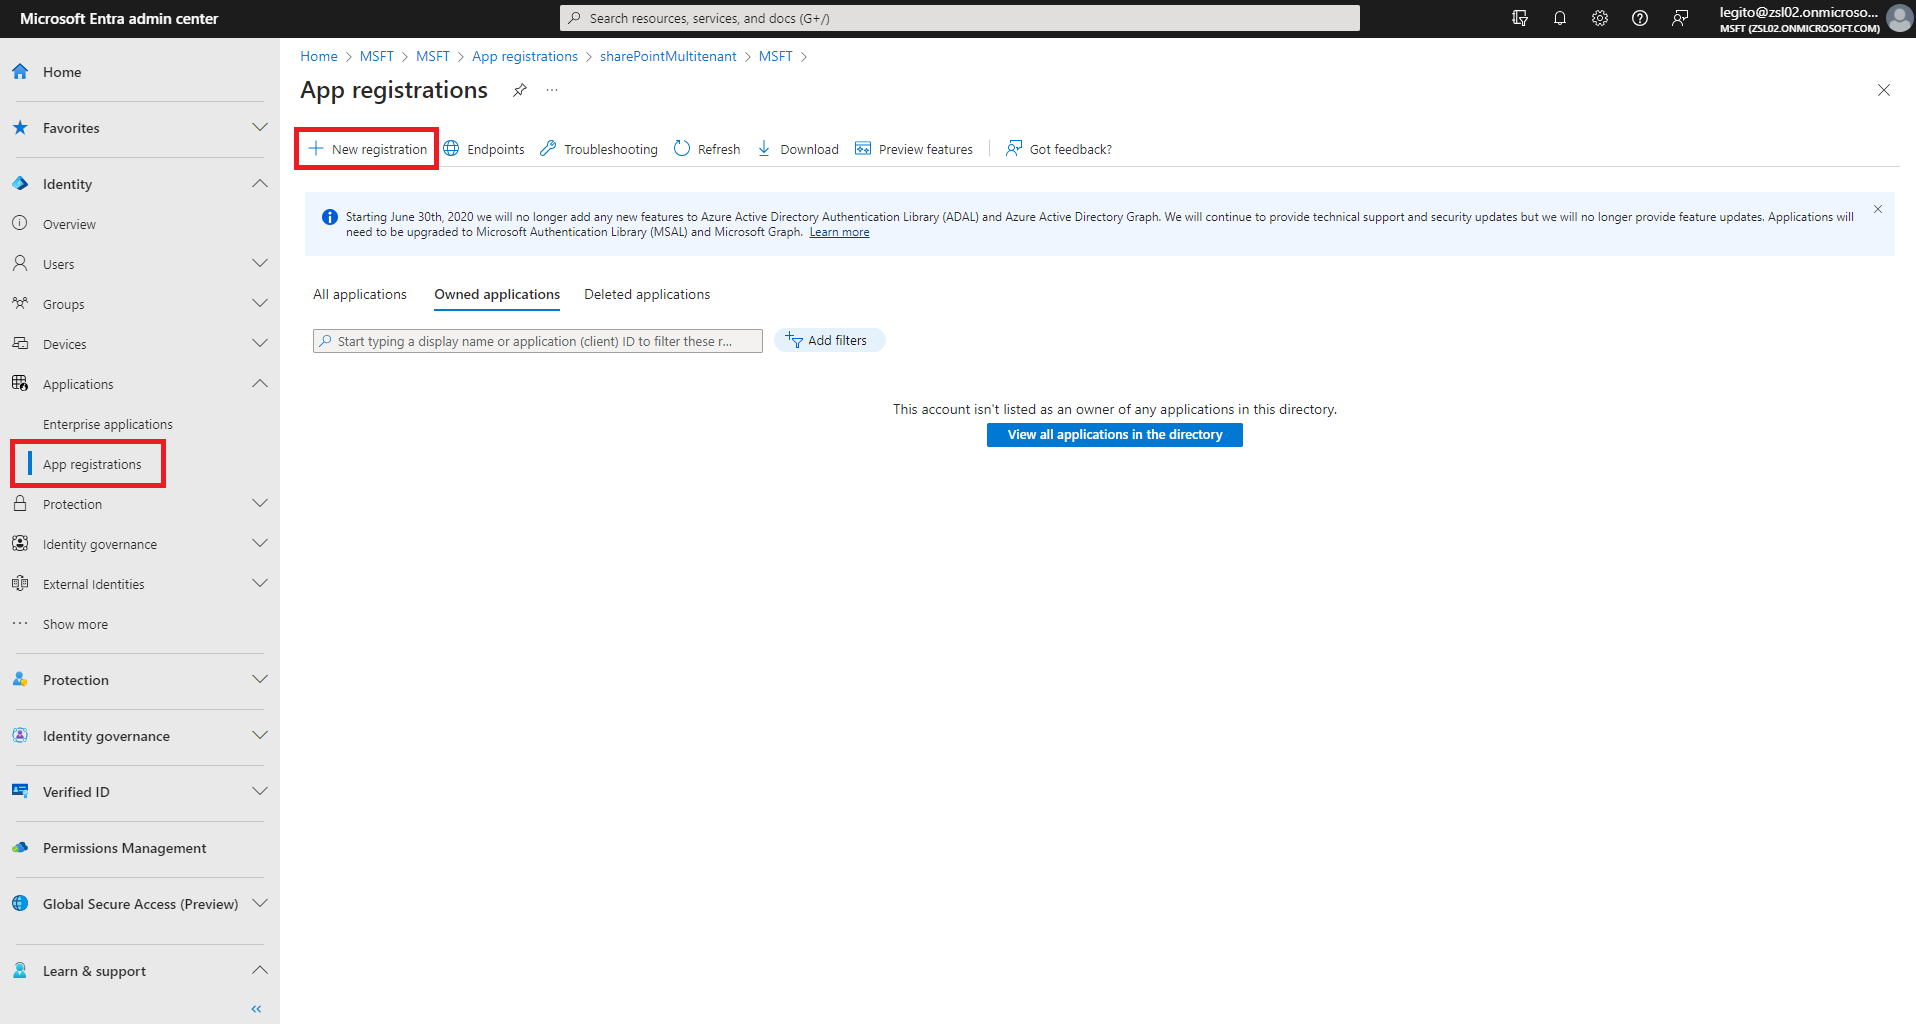
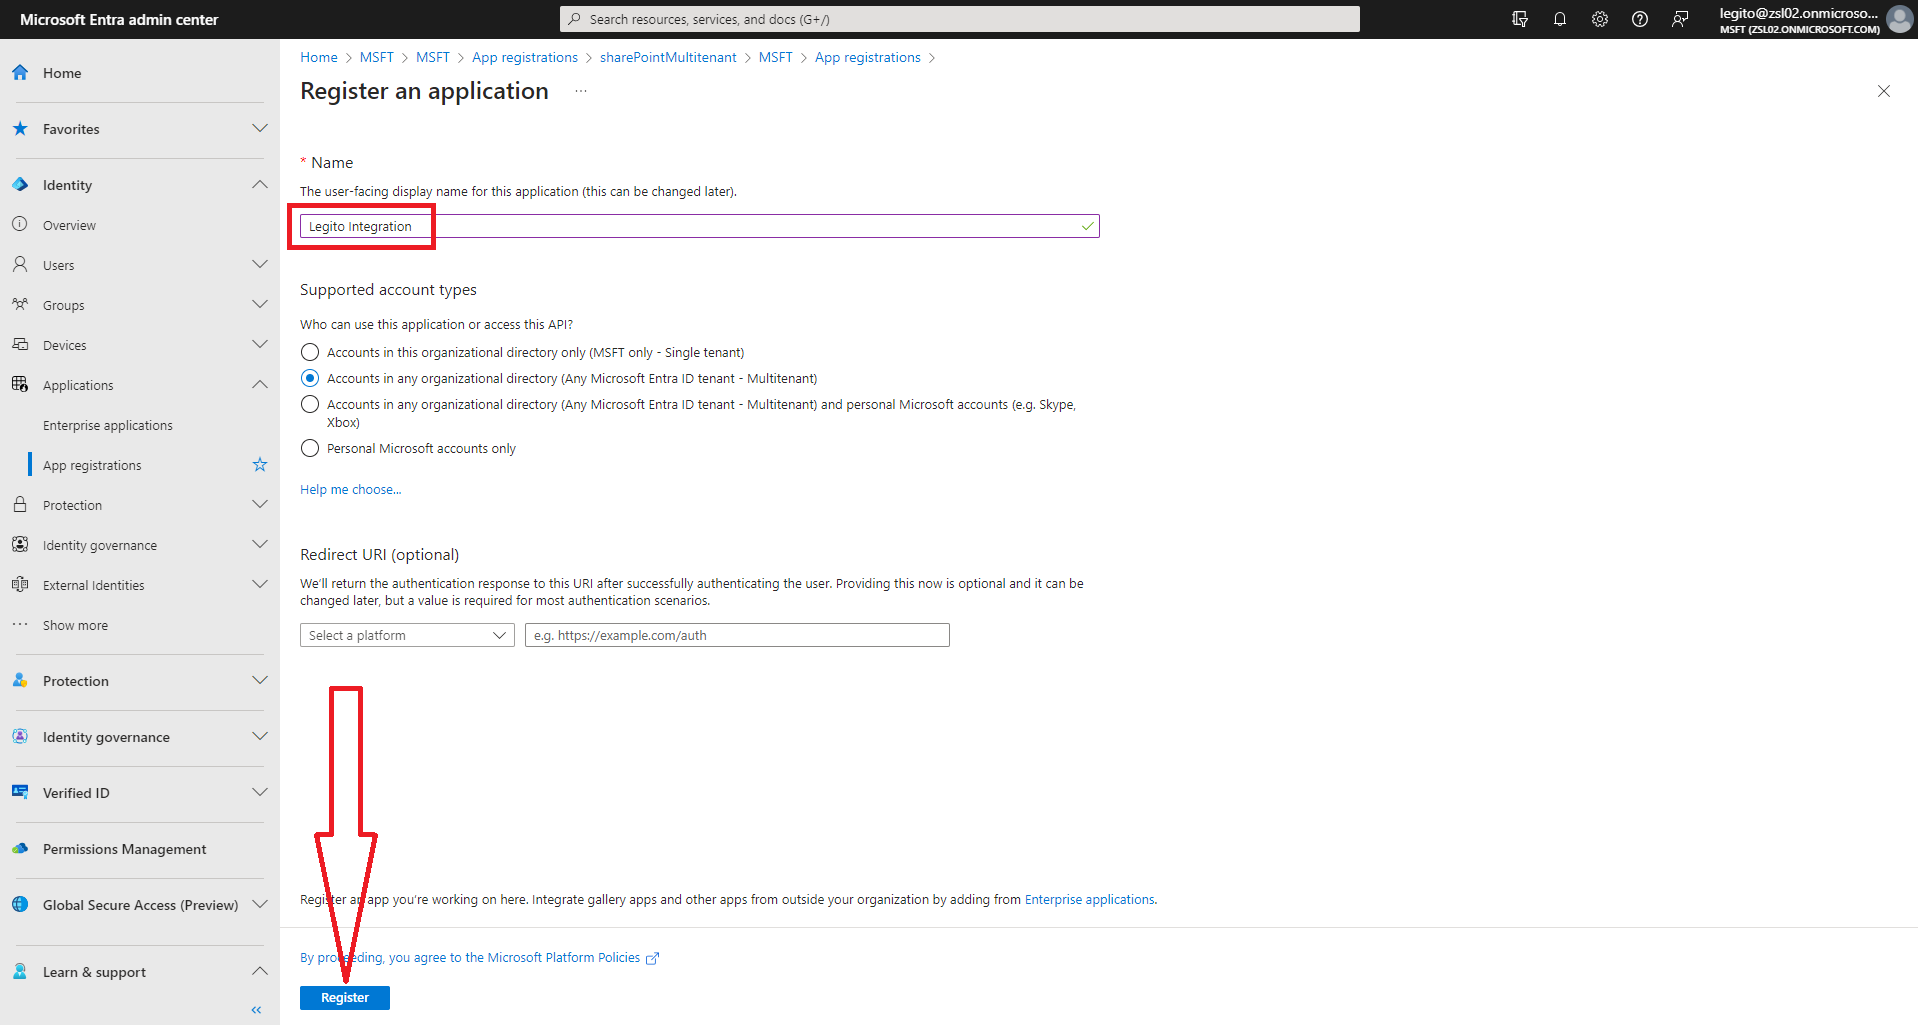
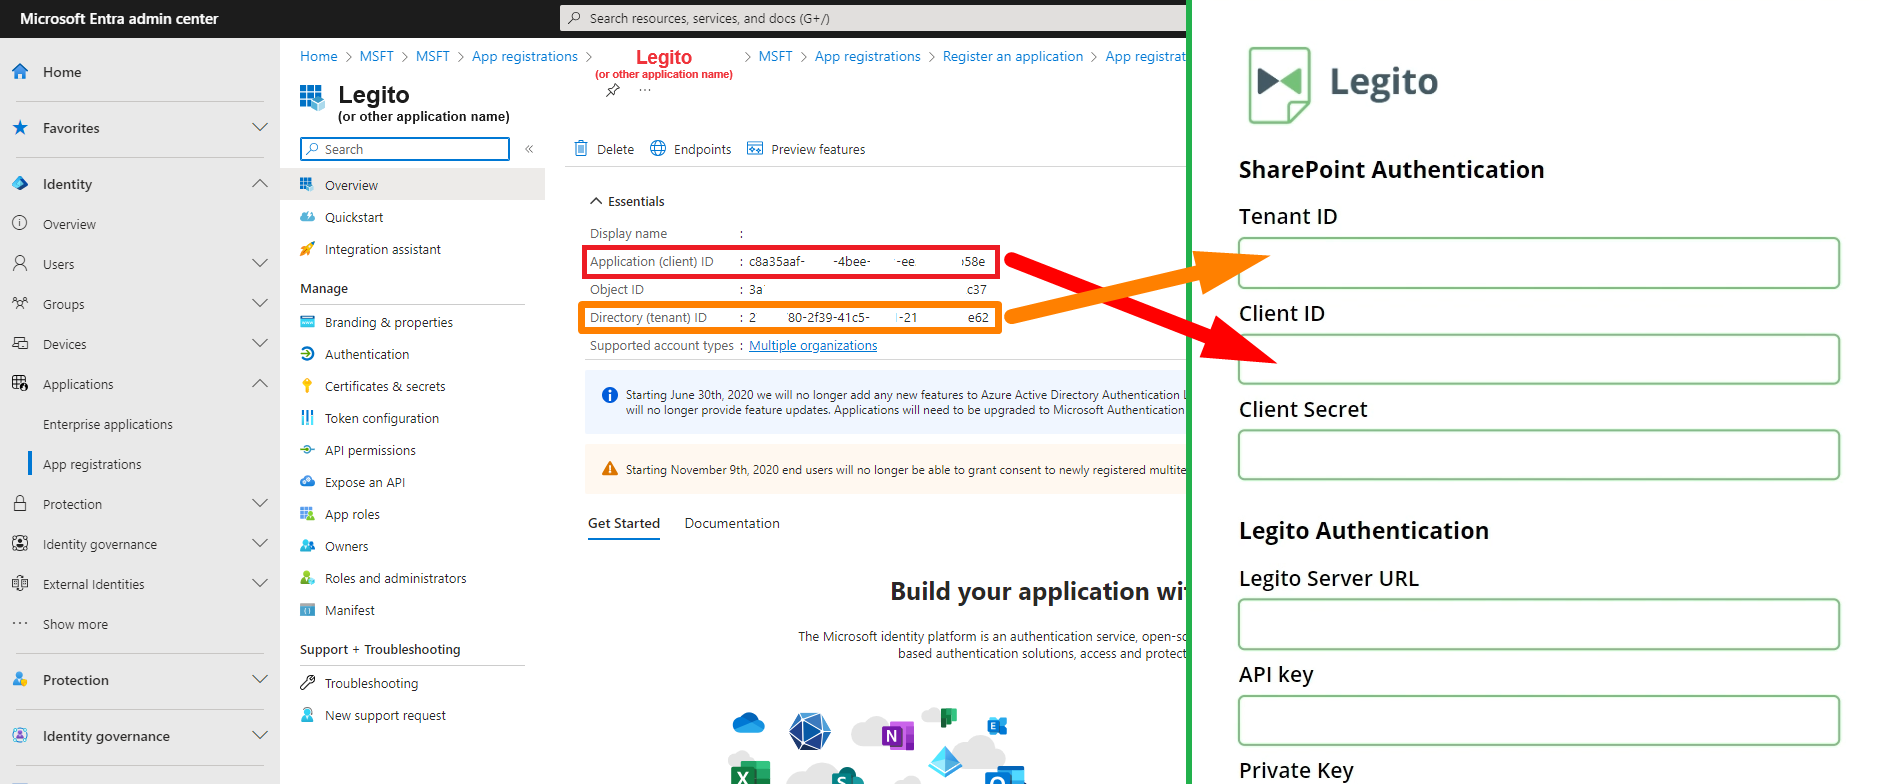
Step 1: Get credentials in App registrations section
Go to App registration in SharePoint. Click the New Registration button.
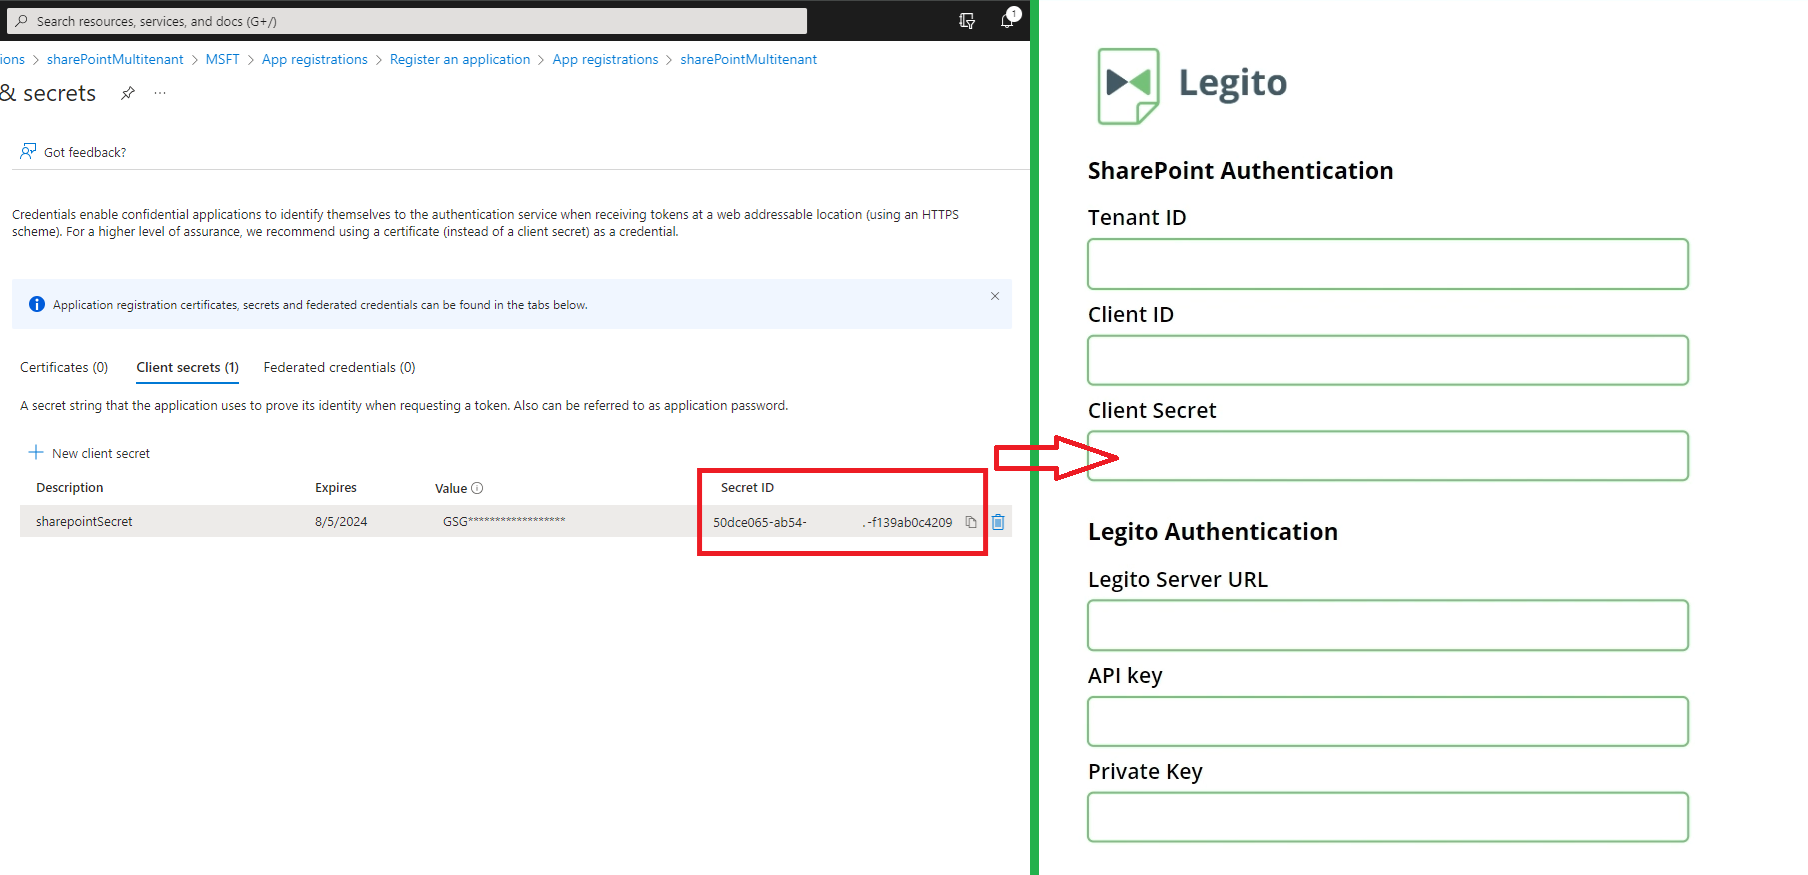
Insert Tenant ID and Client ID in the relevant fields.
Open the Certificates and secrets section in the App registration you just created. Click on New client secret.
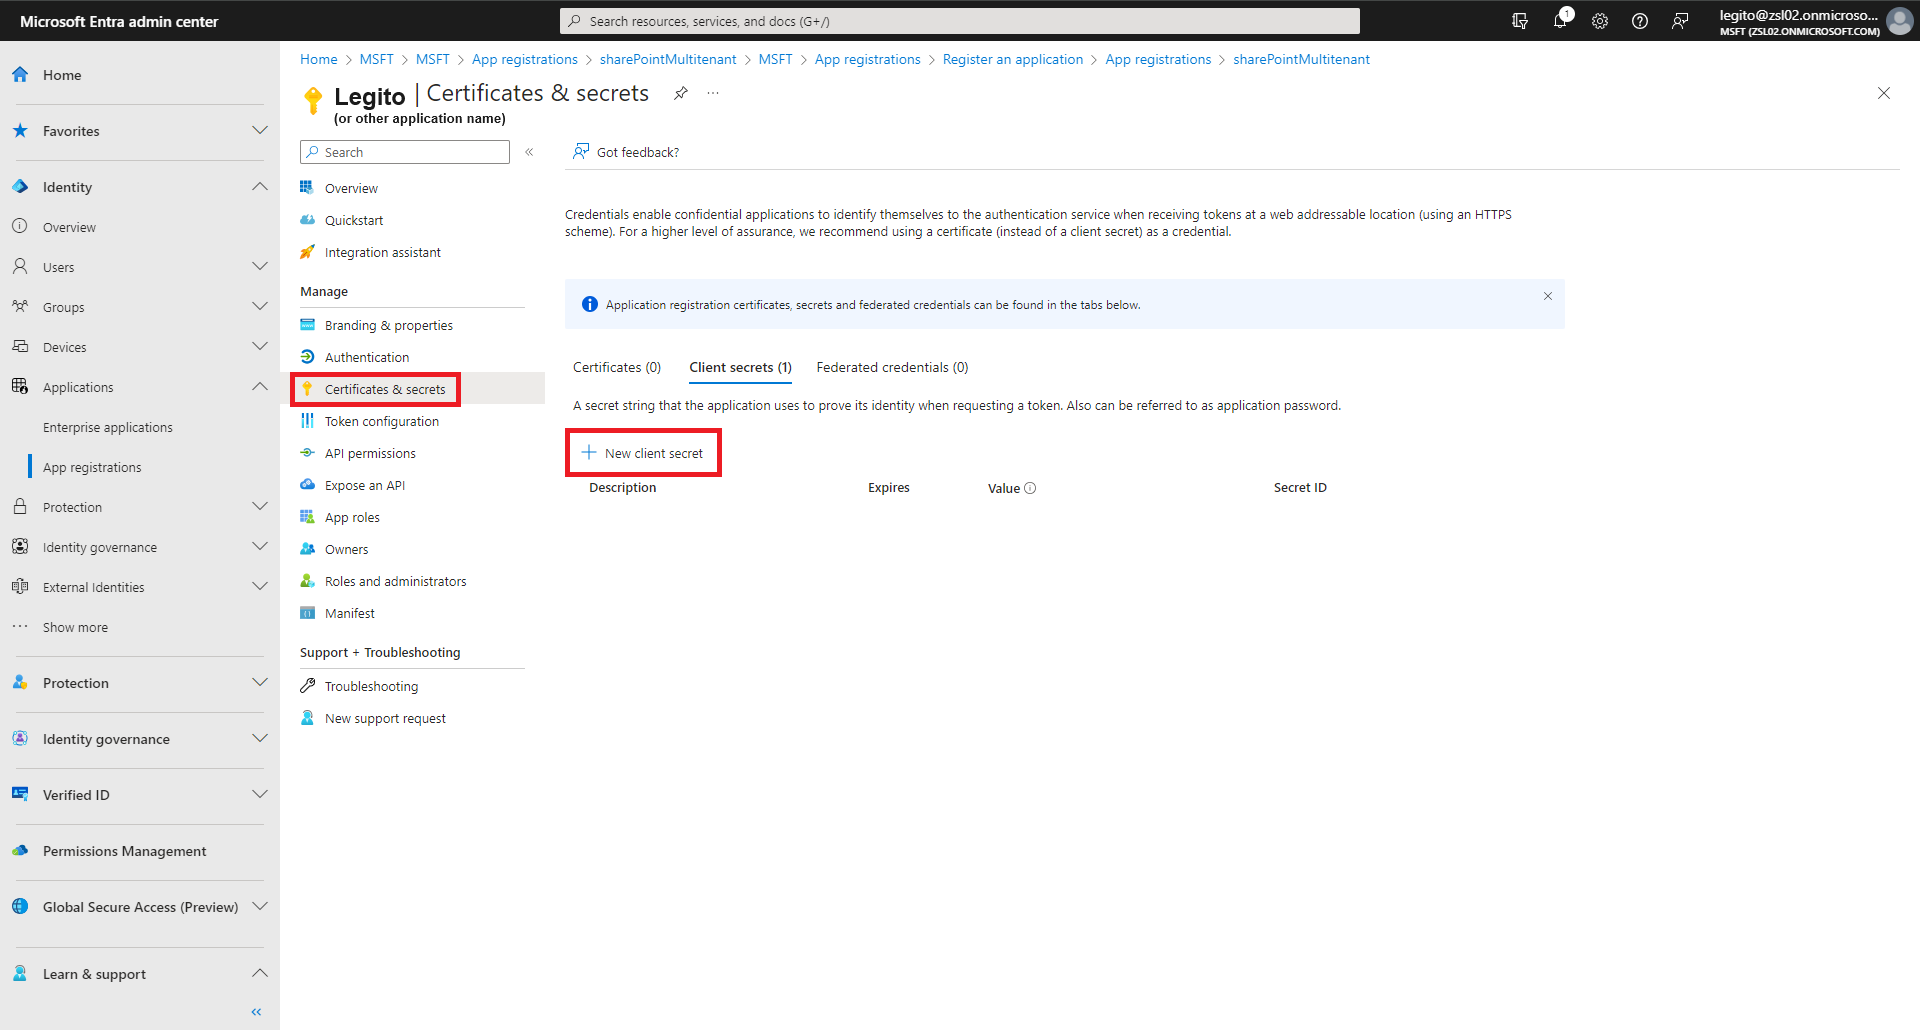
Insert Value to the Client Secret field on the left side.
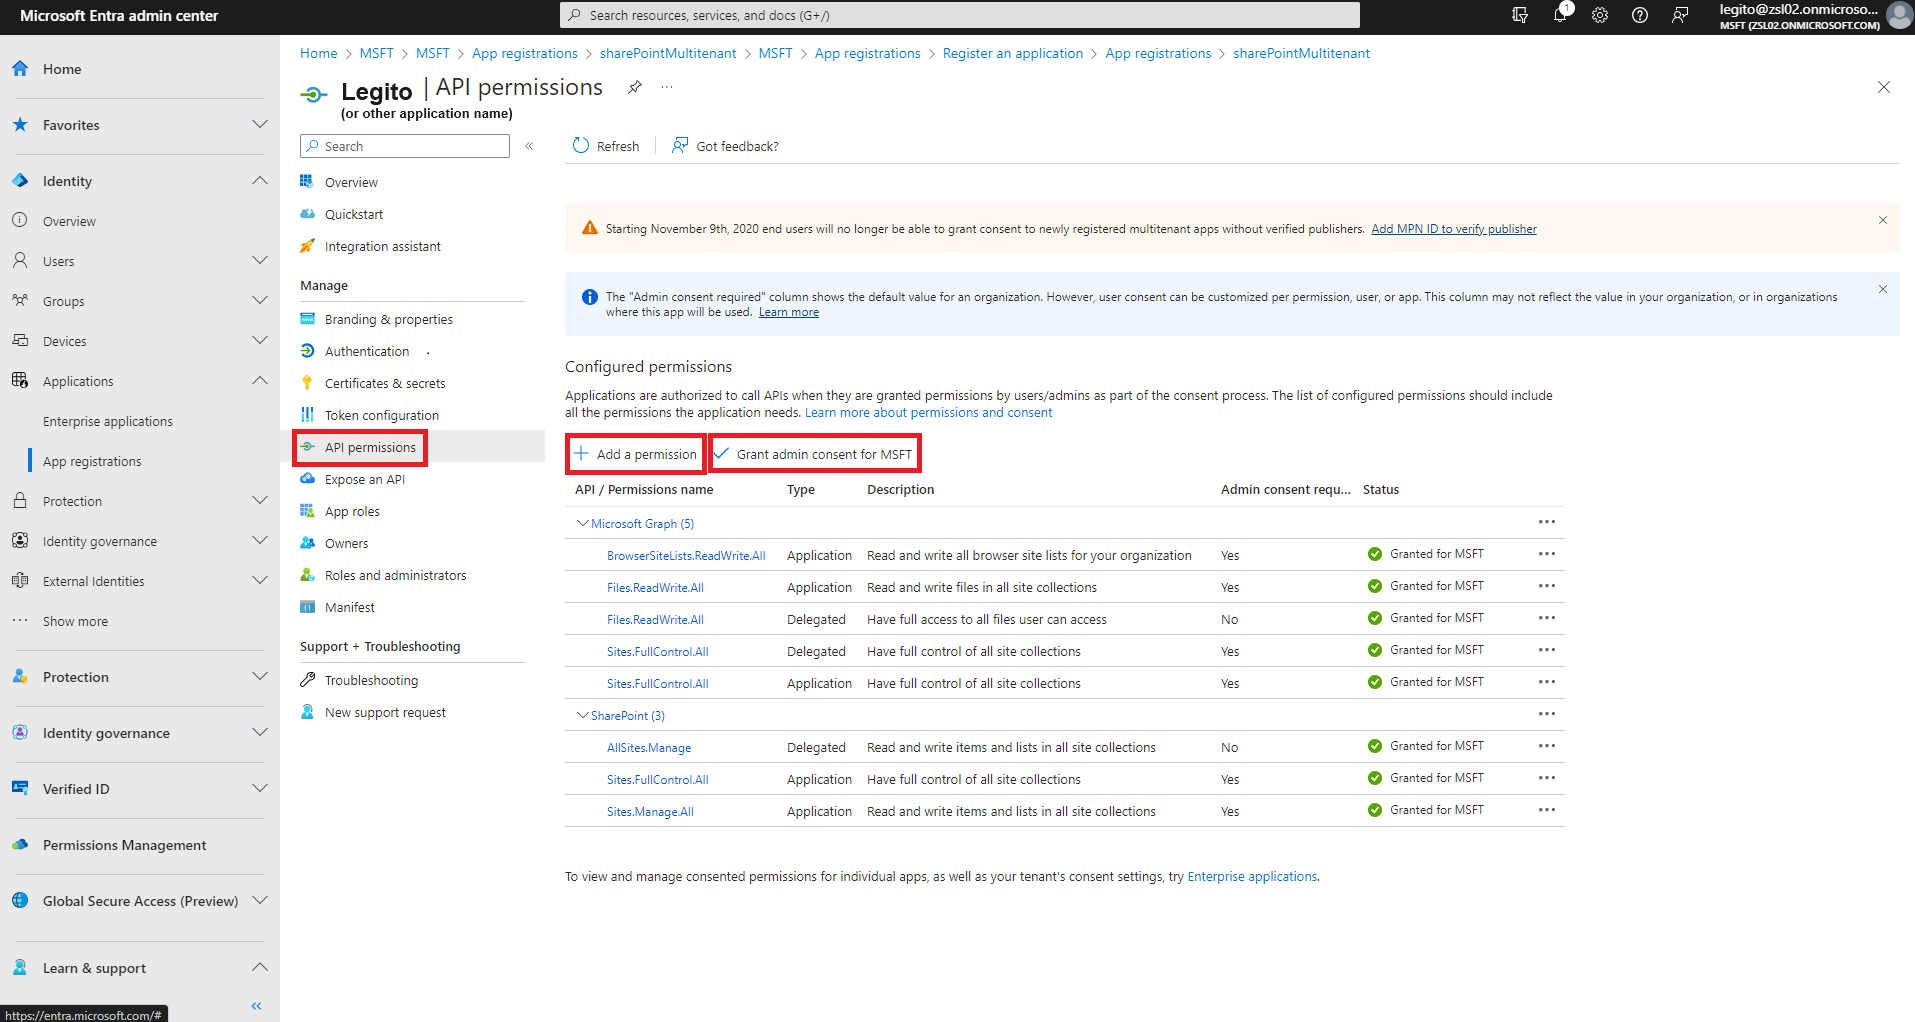
Open the API permissions section in the App. Click on the Add a permission button. Allow all relevant permissions for the App:
Click on the Grant admins consent for MSFT button.
Step 2: Legito Server Location URL
Insert the URL of your Legito Workspace server location (e.g., us.legito.com, emea.legito.com).
Step 3: Insert Keys
Go to the API Keys section in your Legito Workspace, generate API Keys, and insert both API Keys in the fields on the left side.
Click on the Next button.
Step 4: Choose SharePoint Site
Choose the SharePoint Site where your Legito-generated documents will be uploaded.
Step 5: Confirm the Integration
Once confirmed, the integration is ready. A new “SharePoint” webhook will be created in the Push API section of your Legito Workspace. Triggers and other properties of the webhook may be modified.